Search 2.0

Monday, January 9, 2012

Doll House DIY

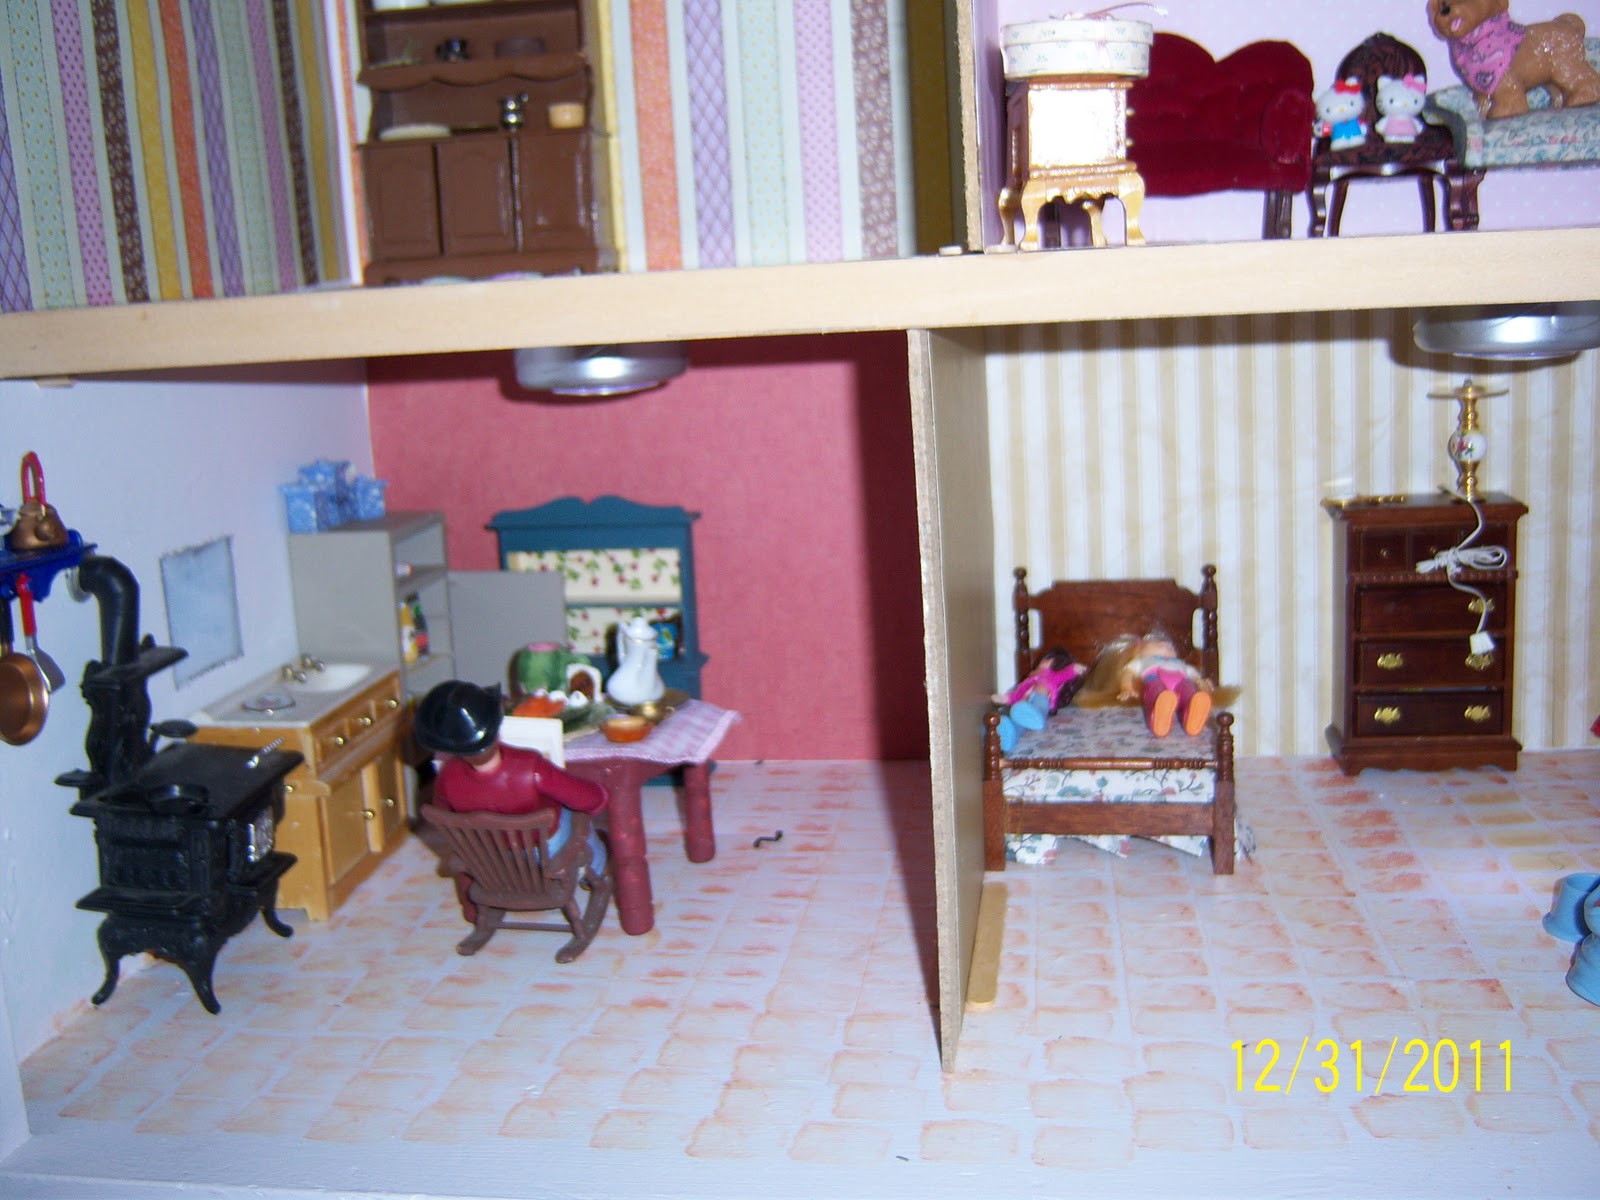
This is the year my granddaughters are old enough to have real doll house furniture, and miniatures to play with. I have kept this furniture in good condition over the years in hopes of passing it on to my granddaughters.
Checking on the prices of doll houses, I thought making one would be more cost effective. I scoured around seeing what shelving I already had which would make a good doll house. This doll house can be kept on the side of the wall not taking up too much room, since the shelf is sturdy.
My daughter-in-law had this beat up child's chipboard dresser set.

I talked my husband into helping me, by cutting the top part of the dresser off the rest of the drawers.He also added , 3/4 inch ply wood boards for the different floors levels, also putting divides vertically to make the walls. Repainted the cupboard in the lightest pink hue. 
  I decided to paint the floors, in faux stones. Using a piece of sponge cut into small squares. Dipping it into  paint, then outlining the sides with shading.
Instead of painting walls I purchased stock card paper in different designs, and used it as wall paper. Using rubber cement to glue down to the floors, and walls, this way it would not bubble the paper. It also allows for readjusting the paper if necessary.

The windows were not cut out of the sides since our wood working tools were limited, I painted on the out side faux windows, and on the inside I put curtains up on the wall. The ceilings are equipped with the portable battery operated stick em lights, to give enough light to play.

They are enjoying their new doll house, and furnishings.

Thursday, December 8, 2011

Children Christmas Crafts Child"s Apron


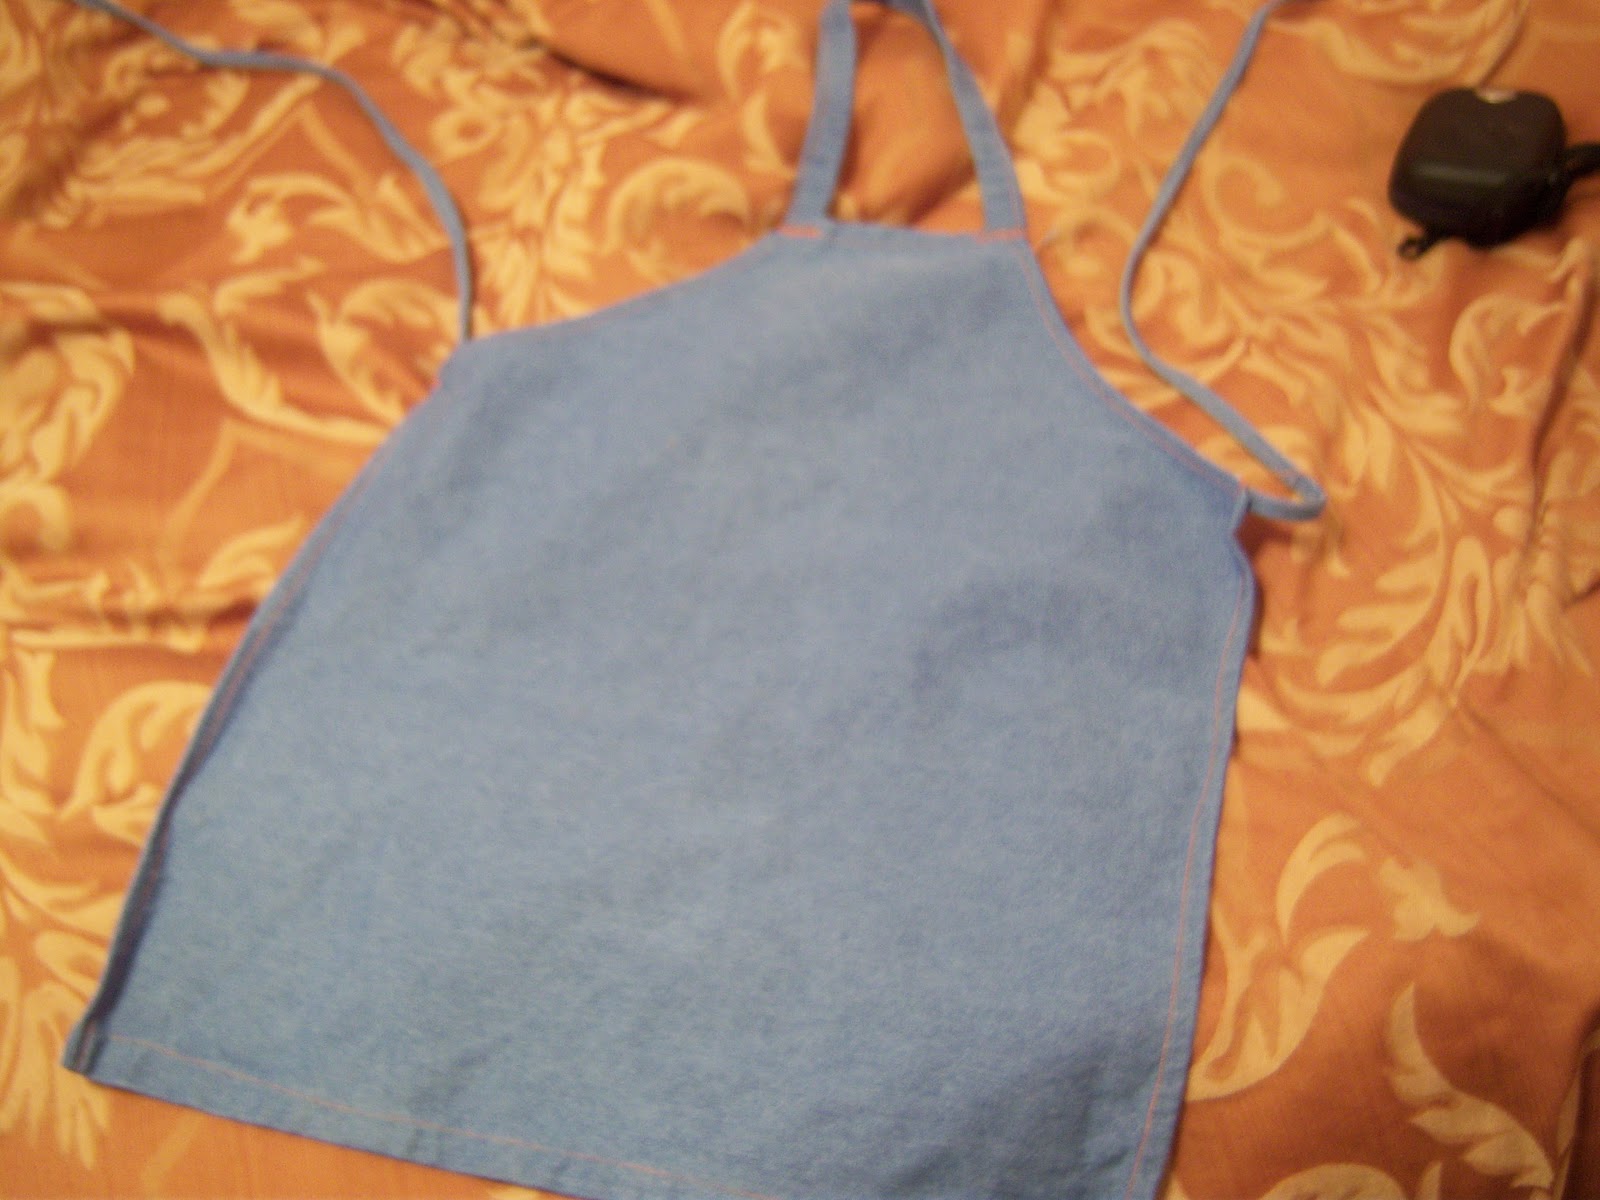
My granddaughters love to cook, especially baking, as soon as they see the flour, and sugar coming out of the pantry, they run to put their miniature aprons on. My granddaughter enjoyed helping to paint her apron. look at her face, as she models it, that tells the whole story.

Materials:
Wooden gingerbread cut out to trace
Textile medium Americana
Denim apron  half yard denim materiel
Americana paints- honey brown, white, opaque red, black, hot pink, burnt sienna
Size 6 angle brush, liner brush
Water bucket for rinsing brushes
Paper towels.
White charcoal pencil
Pallet  ( I use a white square ceramic glazed tile, a plate will work just as good)

I made this simple denim child's apron, by turning down the raw edges. Making tie backs from remaining material pieces, and attaching a neck band.


Use the wooden cut out to trace the gingerbread on to apron. Use white charcoal pencil.


 The white charcoal pencil will make it easier to see.


Dip your paint brush into the textile medium, then into the honey brown paint. Paint using your angle brush, along the line of the pattern.
While paint is still wet side load burnt sienna, on top of the honey brown, while it's still wet. It will blend easier.
Cheeks are done with hot pink.
 Eyes are black (use the back of the paint brush dipped into paint from pallet.
White is thinned out with water until it's as thin as cream. Load your liner brush to paint the icing lines. Hold the brush straight up, move your whole arm in a sweeping motion. Pushing down makes thicker lines, lifting up on the brush makes thinner lines.

Lips and, buttons are drawn in black.
Hearts are done in red.

Hear are some other designs...Christmas Stars,Gingerbread Garland,Toy Soldiers.

Sunday, November 20, 2011

Toddlers Raglan Sweater 24 months


This is my first try at making a raglan sweater. It is worked from the top, to the bottom, what I like about this sweater is that the sleeves are knitted into the main, body there aren't any bulky seams at the sleeve area. The edging is knitted at the same time also, so there is no attaching the ribbing and removing the ribbing until you get it right.

I tried putting metal snap buttons which I didn't care for. I wound up sewing small gray buttons, The guarder stitch was large enough , to allow the buttons to slip through with out having to knit button holes.
Here's my first try at making a sweater 4 years ago. This sweater was knit in sections, then pieced together. It just doesn't have the smooth look of a store bought sweater.

Supplies
4 double knitting weight yarn (150 yards)
2  circular knitting needles size 4   24 inch
4 small button
Large blunt eye needle
4 plastic ring stitch markers
2 Rubber stoppers

Gauge 5 stitches per inch

Cast 71 stitches on circular needles.

Start working the ribbing  p2, k2 for first 5 rows this will become the neck.

Row 6  k17 place marker, k8, place marker,  k21, place marker, k8 place marker, k17

Row 7  k5, purl to last 5 remaining stitches, k5

Row8  k up to one stitch before marker, yo, k1, marker, k1, yo, knit to end of row

Row9  k5 purl to last 5 stitches k5

Every even row will be knitted the increases will be done at the markers before and after the markers. Every odd row will be k5 purl to the end, k5

Knit until it measures 5 3/4 inches long from top to bottom. 226 stitches on needles. Knit up to the marker, place the next 48 stitches on a separate scrap yarn, knit up to 3rd marker, place next 48 stitches on scrap yarn. This separates sleeves from body of sweater. Continue working in stockinette stitch,  remembering to  knit first 5, and last 5 stitches. The last 10 rows are worked in garter stitch which is knit right side, and wrong side of sweater.

Sleeves: Transfer the sleeve stitches from scrap yarn onto both sets of circular needles.  Working both sleeves at the same time, I like to do it this way because it makes for more even looking sleeves.

Place a rubber knob at the end of the set of needles your not using. This will help you keep up with the correct needle.
 Decrease 1 stitch at row 13, 18,21,25,28,35,36,37,38,39,40
Work ribbing, p2,k2 for next 15 rows, bind off.


Here's the same pattern with designs, knitted right into the pattern.
Flowers were designed on this sweater.

Tuesday, November 1, 2011

Children Christmas Crafts Toy Soldier Ornaments

This is a great project for little hands to help with, plus they are so proud of the results. Toy soldier Christmas tree ornaments! The adults need to help with the cutting, and sanding of the cloths pins. Have fun with this family project.

Materials
Old fashioned cloths pins these are sold at Jo Ann's, and Micheal's
Hand saw
Paints dark blue, red, white, black, skin tone, pink acrylic Walmart carries a variety of Folk-Art paints
Paint brushes
Closed eye hooks
Jewelry glue
String or thin ribbon to hang ornaments


The flat cloths pin on the left be comes the body, the one on the right becomes the head, and hat.

Cut this cloths pin 1 1/4 like shown in picture.
Cut this one from the bottom 1 1/4 at the bottom.
This the toy soldier ready for painting.
The head is painted in flesh color, the hat in dark blue, the body top is done in red, the pants in dark blue, the hands are painted in white.
To paint the brim I use a black permanent marker, it makes a neater brim.
The cheeks are done in a blush pink color, a white dot in the opposite corners of the cheeks, a tassel  in drawn with the marker in the middle of the hat. Dots for eyes. Screw metal eye screw on top of the hat to attached string through.

Glue head to body, and arms to the side. Add finishing touches like buttons, sash, and boots. Insert ribbon,or string through the eye hook. Enjoy making these toy soldier ornaments.

Friday, October 7, 2011

Tamales

I normally make tamales around the holidays, mostly because of all the preparation involved in making them. I have learned if I make them in smaller quantities they are much more manageable

Ingredient for masa
1 pound of fresh ground masa  (tortilla factories, or some grocery stores carry fresh masa.)
1 cup lard or butter
1 cup of oil canola or safflower
2 soft bullion chicken cubes
1 1/2 water
1 package dried corn leaves
1 fresh cut corn off the cob

Meat filling
1 small pork roast
5 poblano peppers seeded and roasted
5 garlic cloves peeled
1 28oz can of red enchilada sauce
1 teaspoon cumin
1/3 cup brown sugar

Garnish
Sour cream
Franks, or Red Devil hot sauce
Slice and seed poblano peppers, roast in the oven until skins turn dark, on broiler setting
Place pork roast, peeled roasted poblano peppers,and garlic cloves to cook in crock pot for 8 hours. Or you may cook it the night before.


To prepare the masa start by placing the masa in a large bowl, notice how dry, course it is in appearance. 

.Work the lard in by hand.
Add the oil, Add chicken bullion to the water until well incorporated, last add the corn off of 1 fresh ear of corn. The masa should have a farina like texture. Set to the side while preparing the filling.

Pull the pork roast apart add to a bowl, Add the can of enchilada sauce.
Place the cooked roasted poblanos, with some enchilada sauce to grind completely as shown in the picture. Add to the bowl meat mixture it will add another layer of flavor, plus thicken the sauce. Add the 1/3 cup of brown sugar at this time also. Set to the side while preparing the corn leaves.
Place the dry leaves in large bowl with water to soften. Take leaves apart cleaning off the dry corn silk.
Spread masa about 1/4 inch thick with the back of a spoon. Just like buttering bread.. Placing masa at one edge leaving the other edge clean.
Place about 1 to 2 teaspoons of filling in the center.

Roll up.

Bend in the middle flip over on the other side.
I converted my pot into a tamale pot by adding a grate to keep an inch of space between the pot and the tamales.
I lined the pot with aluminum foil so the tamales would not fall into the water.

Line the tamales with the open end up, stacked against the wall of the pot. Add 3 cups of water in the bottom of the pot this will steam the tamales. cook on stove top at medium heat for 1 hour the steam from the bottom will cook the masa. Check for done by pulling one tamale out peel back corn leaf if it holds together it is done.
Garnish with sour cream and hot sauce. Enjoy!