Search 2.0

Friday, April 29, 2011

Mexican Style Finger Food Chorizo with Eggs

Ever have a hankering for something to eat, not sweet, nor fussy? This Mexican style finger food might just fit the bill, only having 5 ingredients unless you make your own .homemade flour tortillas

Ingredients:
1 dozen flour tortilla or my homemade flour tortillas
1 Cacique pork chorizo 10 oz
6 large eggs
1/2 cup grated mild cheddar cheese
1/4 cup canola oil


In large heavy skillet fry chorizo until it releases the grease about 8 minutes, stirring constantly with a spatula. Set to the side.

Scramble the 6 eggs and fry stirring constantly, take off the stove a few seconds before the eggs dry up.


 Add the scrambled eggs, and grated cheese to the chorizo mixture, it should resemble the picture.
Make sure to warm up store bought  flour tortilla in pan before you try to roll them. Roll into flautas.
Fry till crispy and golden brown it won't take long.
Drain on paper towels and serve right away.

Friday, April 22, 2011

Knitted Beaded Clutch Purse

Have you ever seen those beautiful antique beaded purses?  My next project was to figure out how to make a stylish clutch purse. I bought these sparkle beads back in the 90's, I have been toting them from state to state in the. hopes of someday using them on a special project.
Ran across this book from Bag Lady Press written by Theresa Williams called Bead Knitted Handbags 2. The bag came together fairly easy, my one concern was that I might not have enough beads, so I changed the pattern a bit to make sure I had plenty.

The pattern is knitted in three pieces, the main piece, and the side gussets.


The beads are inserted on the thread, and slid between the knitted part.


The inside is then lined with satin material. What do you think of this project?

Sunday, April 3, 2011

Knitted Clutch Purse


I love to knit, and I love to work with beads, beads, beads. I love the way beads catch the light. There is something  so exciting to me when I see one strand of yarn turn into a purse, a sweater, a hat...  

I decided to design a knitted clutch purse in the same colors, and beads as my hand made knitted purse   I was looking for a smaller clutch type purse to take with me, for those special occasions when you don't want to lug a large purse, a small one tucked under your arm will do nicely.

Supplies:
1/2 inch dowel 36 inches
2 wooden balls drilled out at 1/2 inch
Glue
1 large button of your choice
1 skein yarn thin 75% acrylic 25% wool 150 yards
Size 4 circular knitting needles
1 large eye blunt needle
1 packet of glass beads 60 grams
Material of choice for lining 1/8 yard
Size e crochet hook


 Seed st (k1, p1 ) all the way across. Next row (p1 ,k1) all the way across. You will be purling where you knit and knitting where you purled.

Cast on 65 sts. Work in the seed st pattern till the body measures 5 1/2

Next row bind off 6 sts. from the beginning of the next 2 roads.

Knit across till it measures 2 inches.

Cast on 6 sts at the beginning of the next 2 rows.

Work the 65 sts til it measures 51/2 inches.
This will make the notch that will become the bottom of the purse.

After adding the beads, sew the sides up as shown in the handmade knitted purse. I lined this purse without the cardboard.
Sew the yarn around the wooden dowel after gluing the wooden balls in place. Make sure none of the wooden dowel shows.

Fold the flaps in at the edges of the the purse as you sew.

Sew the button in the front of the purse.
To make flap  chain 8 stitches.single crochet for 10 rows.
Next row single crochet 4 stitches chain 1 skip 1. and finish single crocheting the rest of that row.
Rows 11 - 12 continue in single crochet.
Row 13 decrease one stitch on each side  til your left with 4 single crochets. bind off attach to the back of purse.


The front wooden dowel will not have wooden beads added. It will fit snugly into the dowel with the wooden balls. See photo at top.

Thursday, March 17, 2011

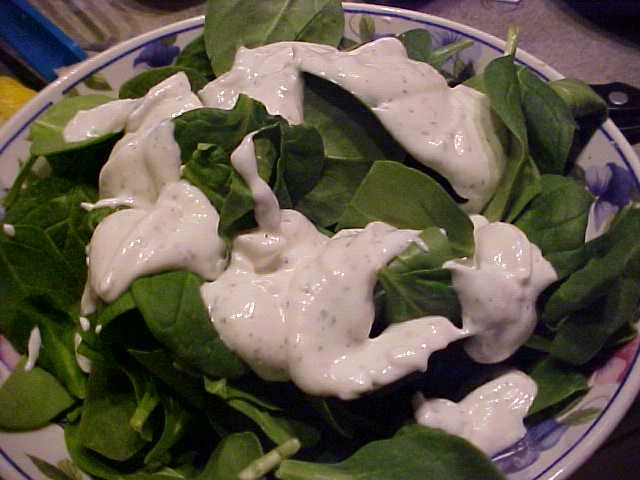
Creamy Healthy Salad Dressing

I know the title of this dressing doesn't sound very appetizing, but believe me when I tell you that you will be pleasantly surprise when you wrap your lips around this one. I don't know if you have ever tried the Coco's house dressing, or not, but that's the closest I can tell you that it tastes like.


Ingredients


  1. bullet blender with top opening, or a bowl with hand whisk
  2. 1/2 cup  soy milk
  3. 3/4 cup canola, or safflower oil
  4. 1 teaspoon dry dill weed
  5. 1 teaspoon garlic powder
  6. 1 teaspoon onion powder
  7. 1/4 teaspoon salt
  8. 2 medium size lemons


Pour 1/2 cup of soy milk into the bullet, turn bullet on then slowly drizzly the 3/4 cup of oil. If you pour it in too quickly the dressing will not thicken so this step is very important to follow closely.

The alternative method is to pour the soy milk in to a small bowl, and slowly drizzle the oil while beating quickly with the whisk. Make sure the milk thickens up before going on to the next step.


Squeeze both lemons through the top of bullet while it's running you will notice the soy milk dressing will thicken up even more. 

Add the rest of the dry seasonings to the bullet mix until the dill looks like  green specs of pepper swimming in a sea of milk. Taste, and see if  you agree with me about this delicious soy milk dressing. It makes a great vegetable dip too.

DIY Window Covers for Odd Shaped Windows

 Have you ever been stumped by how to cover odd shaped windows?  I would say this is a do it yourself project.  The windows in the living room are odd shaped,with an uneven ceiling
. In the summer the light pours in those windows like a beacon. Not only is it extremely bright, but also hot.  The way to help take a handle on my energy costs  I came up with a homemade inexpensive way to cover those windows, and save money.

I didn't want to hang curtains above the Roman shades below, because the ceiling was not straight. I would have had to hang the curtains on a slant. I couldn't use those paper covers because of the shape of the windows.. My daughter-in-law suggested that I make cardboard cover ups with cloth, that would sit inside the frames.
Supplies

  1. white copy paper
  2. large cardboard boxes
  3. glue gun
  4. material your choice of color for inside window
  5. white material for out side of window
  6. scissors
  7. utility knife
  8. pins:


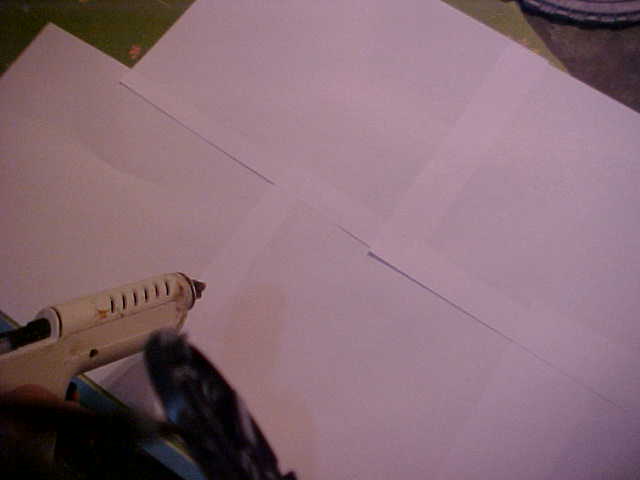
First I had to figure out how to make a pattern. I came up with gluing white copy  paper together with the glue gun. I made the size of the sheets glued together a little larger than the windows.


I placed the paper over the opening of the window. Using a small pencil I traced inside the window, with one hand while holding the paper with the other.


This is what the paper looked like after I pulled it off the window.


Then I cut out around the pencil tracing as shown in the diagram.


Then I went back, and placed it in the window, to make sure that it fit properly. It did fit as you can see.


Cut the cardboard using the pattern. Place the pattern on top of large piece of cardboard. Using a marker draw shape onto board. Use utility knife to cut out the shape. Place over window to see if it fits good. If it needs small amounts of trimming do it at this time.


Place white material over cardboard shape. Using glue gun. paste white material over edges of cardboard. The white material will show on the outside of the windows.


Do the same for the front side of the window using pattern material that side will show on the inside of the house, where the white side will show on the outside of the house.


Then I glued the unfinished side butting them together, to where the fabric side are showing. Place them in the window. You may want to hot glue them to the metal casing if necessary. Hot glue holds well, but will peal off
when you need it to come off.
Also see my kitchen redo on the cheap , and kitchen cabinet spice drawer

Monday, March 14, 2011

Dinosaur Piñata Tutorial

My grandson was having a birthday soon, and their cousins wanted to make him a dinosaur pinata, for a surprise, since their favorite show is Dino Dan on Nick Jr. We started 3 weeks before his birthday, to give us enough time for the homemade paste to dry.


Supplies:

  1. Newspaper
  2. Flour all purpose
  3. Green floral wire
  4. Papel crepe, or party paper streamers. beige and green colors
  5. White paper
  6. Black markers
  7. Large bowls


One of the first things that needs to be done, is to make the paste. Place 1 cup of water to 1/3 cup of flour into a medium sauce pan. Stirring constantly until it begins to thicken. That should take about 8 minutes. Once it starts to boil take off from the heat source and allow to cool.


While the glue is cooling off. Begin cutting the newspaper into long 2 inch strips. Pick out the bowls your gonna use as your temporary mold. Blow up a large balloon for the body of the dinosaur. (that's the part that is gonna hold the candy surprises.


Before starting cover the bowl and balloon  with Vaseline. Wet the paper strips with homemade paste, and place on the balloon. Covering it totally with 4 layers, one on top of the other.


The girls really enjoyed putting their hands in the sticky paste, and slathering it all over the balloon. Allow balloon to dry over night. It will get hard.


This will be the main body of the dinosaur. Take a sharp  pointed knife, pop the balloon, and begin sawing a square shape into the newspaper ball.
 This will be the lid to place the candies in. This will also be where your gonna stick your hands into, to thread the green wire for the legs, arms, neck,see my Elmo pinata tutorial and the hanging wire to hold up the piñata while it swings in the air to be broken.

Here we are adding the tail.


Here is the beginning of the legs.


Here you can see the tail, the legs, and head coming to life. The wire sticking out the top of the dinosaur is the place where it will hang. After adding all the legs, and head. Apply another 3 layers of wet paste newspaper strips. Allow once again to dry overnight.


The fun begins now take the party rounds, pull off enough to re-roll small sections as shown above. With scissors cut half way up 1/8 of inch apart. Do not cut all the way through.

With your fingers press back to give it a curl like as your finger were a curling wand, and the paper your hair.
Begin  pasting the cut curled colored strips, on the body form. Space the strips 1/4 of an inch apart, until the whole pinata is completed.

Can you tell the girls are mighty pleased with their surprise dinosaur pinata for their cousin?