Search 2.0

Thursday, September 29, 2011

Mexican Style Sweet Roll Pan Dulce

There's nothing quit as satisfying as dunking pan dulce in a glass of milk. The first time I enjoyed one of these jewels I was a child living with my abuelita Rufa in Mexico, I remember the bread man coming to the house just about every morning with a huge large 4 foot basket on top of his head selling all the Mexican pastries.  There were a couple of things that caught my attention, I wondered  how does he carry that basket on his head, and where did he learn to bake so good, I was delighted to receive the recipe so now I can make my own pan dulce at home anytime I desire.

Ingredients:
1 cup milk
1/4 cup sugar
1/4 cup shortening
1/4 teaspoon salt
2 1/2 teaspoon yeast
2 eggs beaten
4 to 41/2 cups of flour

Cinnamon Topping
1 1/2 cup flour
1 cup sugar
2 tablespoon cinnamon
1 stick butter
4 egg yolks from size large eggs
1/2 teaspoon vanilla

In medium sauce pan place milk, sugar, shortening, and salt to warm up, the shortening will almost start to melt. about 115 degrees or you can stick your finger in it it should be slightly warm.
Remove milk mixture from the stove add yeast and stir till well blended. Add 2 eggs to a small bowl slightly beaten.
Place a bit of the warm milk mixture to the bowl containing the beaten eggs to warm the egg mixture so not to cook the eggs. Then pour all of the egg mixture into the warm milk mixture.

Starting with 4 cups of flour, placed in a mixing bowl with dough hook attachment.( Saving the 1/2 cup for use if needed). Pour egg milk mixture into flour.


Mix till dough comes together and starts climbing up the hook, about 5 minutes. The dough should be smooth, moderately stiff, and elastic.
Place dough in a greased large bowl. to rise. Take the edges of the dough and insert them in the middle, as shown in the photo. Turn over once  to grease other side of dough. This procedure helps the dough rise evenly.
Cover bowl to rise the dough.
I like to cover my bowl with clear plastic wrap I find it works better, than a kitchen towel. Let rise in a warm place until the dough doubles in size. It should take about 2 hours.
Punch down the dough, divide into 16 portions, shape into ball, and place on greased baking sheet. Pat down with your fingers to the size of 3 1/2 inches, about 1 inch apart. Cover the dough to rise again, in the mean time make cinnamon topping.( I spray the back of the clear wrap with Pam and cover the dough. I find if I spray the wrap won't stick to the dough when I remove it.)
0


To make cinnamon topping, place in a bowl, 1 1/4 cup flour, 1 cup sugar, 2 tablespoon cinnamon, half cup butter, 4 beaten egg yolks, half teaspoon vanilla. Mix well with a fork. Divide into 16 portions, place topping on lightly floured surface roll out into 3 1/2 inch circles, use a  spatula to help you place cinnamon topping on top of pan dulce.
With the back of a spoon make design on the cinnamon topper. Cover again allow to rise till the dough doubles in size.
Bake in preheated oven, 350 degrees for 15 to 18 minutes till lightly golden. Eat within 3 days, because they are perishable, due to using fresh ingredients without preservatives. Enjooy

How to poach the perfect egg


My favorite way to eat an egg is to have the white cooked, with a little jiggle left in it. My parents had this perfect egg poacher which did a wonderful job, but the one I own makes my eggs hard boiled. My son Robert showed me how to poach the perfect egg with out having to own a special equipment to accomplish it.  I have added a  drizzle of olive oil, salt, and pepper.
The egg yolk is runny, and the white cooked.

Supplies:
Medium sauce pan
Small bowl
Eggs
Salt,and pepper to taste
Olive oil for drizzling

To begin place medium sauce pan to simmer 3/4 filled with water. While waiting for the water to reach temperature break an egg into small bowl.
When you see small bubbles rising to the top take a large spoon, and stir the water until you see a funnel forming in the middle. Quickly place the egg in the middle of the funnel. Then set the timer for 5 minutes. The egg will stop spinning shortly not to worry it will appear to spread apart.
After egg is cooked with a slotted spoon pull it out of the pan, and place in another pan filled with cool water.
Place on paper towel to dry off excess water, serve immediately. Enjoy this healthy version of eating an egg.


Wednesday, August 17, 2011

Minnie Mouse Knitted Diaper Cover and Hat


I was looking to knit a infant Minnie Mouse outfit for the newest edition to the family. I have seen them done in crochet, but I prefer to knit. I enjoy the way knitting moves. I modified the pattern by picking up white yarn  to form Minnie's poka dots. The pattern can be found in www.raverlycom. under The Frantic Mama Knitted Soaker Pattern. I used Patrons Canadiana worsted yarn 100% acrylic yarn.

The hat was done by casting 72 sts in the Patrons Canadiana worsted yarn med weight. Work the ribbing sts by k2, p2 till it measures 2 inches. Change to thick chunky yarn knit skipping every other stitch. you will have 36 sts.
Work the seed st. p1,k1 across the whole row.
Next row knit where you purled, and purl where you knitted. Work this pattern till it measures 5 inches all the way from the bottom.
Next row k2tog to end of row. There will be 18 sts.
Next row knit
Next row k2tog to end of row There will be 9 sts remaining. Cut yarn, leaving a 16 inch tail. Thread tail through remaining sts and pull to gather. Use remaining tail to back seam.

To make ears. this part has to be crochet. Chain 3 sts, slip st to form small circle, keep increasing till the circle measures 21/2 inches. Make 2 ears.

Sunday, August 7, 2011

Quiet Book

I saw this fabulous tutorial for making a interactive book for children on how to make a quiet book. My granddaughters are at the stage where they love to discover, and work with their hands, and minds. I changed  some stuff depending on what I had on hand.

Supplies
2 yards canvas material
Assortment of buttons
Snaps
Felt squares in green, white, brown, yellow, red, tan, and black
Material scrapes in your choice of designs
Yarn
Shoe laces
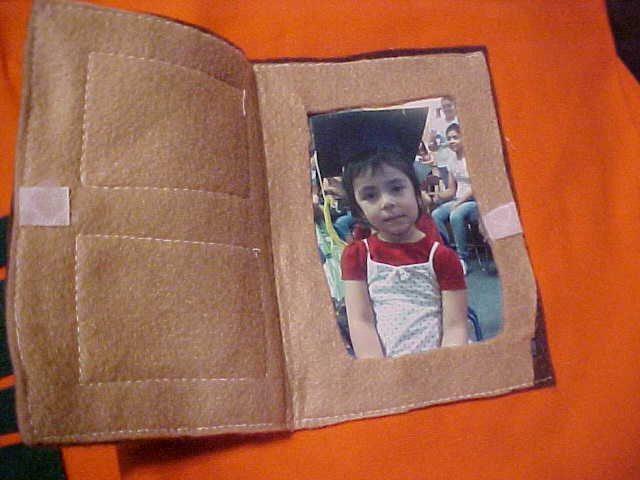
Photos of your choice
3 dimensional tulip paint


Pick the apples from the tree, and place into the basket.

One or two scoops of ice cream?
The animals are in the fence, or in the barn.
I found these cute knitted animal finger puppets at the Atlantic Breeze Alpacas store in Meadows of Dan.

Open the door and see who is there. 

Open the basket to set the picnic table cloth.

Learn how to weave a mat. 
Weaving felt square.

Picking the posies.
Put the flowers in the flower pot.

Tie the ribbon on the teddy bear/
I know how to tie my shoe.
Check the mail.

Friday, August 5, 2011

Fresh Tomato Basil and Cheese Snack

This quick delicious nutritious snack is child friendly. Right now is tomato season in the mountains, we have a surplus of tomatoes.
This recipe is about simplicity. Sometimes having to many ingredients spoil the true flavors of meals. In this dish you can taste the fresh basil, and olive oil., they marry well with the tomato and cheese.

Ingredients
Fresh tomatoes sliced
Mozzarella cheese sliced
Salt and pepper to taste
Fresh basil chopped, infused with extra olive oil
Select ripe tomatoes, slice them into 1/4 of inch rounds, pepper and  salt to you taste.


Place mozzarella cheese slices on tomatoes and grill under the broiler till cheese is melted.


Place chopped basil with olive oil on top. Enjoy!f

Friday, July 29, 2011

Cucumber Juice

Here's a fantastic thing to do with all those cucumbers coming up in the garden. It's cucumber juice, it's really delicious, and refreshing. Cucumbers have a lot of nutrition,  like Vitamin A, K, potassium, and B-Carotene.

Ingredients:
4 cups blended cucumbers
1/3 cup water for blending
2 cups additional  water
1/4 cup sugar

 Clean and dry cucumbers.
Cut into small chunks.
1 cup of cucumbers to 1/3 cup of water ratio.
Blend thoroughly well.
Strain the cucumber pulse. Add 1/4 cup sugar. Refrigerate till chilled. Enjoy!

Tuesday, July 26, 2011

Harvesting Garlic


This is the first year my husband has grown garlic. We received  the bulbs from my sister-in-law Maggie.  One of the reasons we sought to grow our own garlic, was due to the lack of flavor in some of the store bought ones. Have you noticed the bigger the garlic the less flavor it seems to have? Not only that but it tastes different.

Some interesting facts about garlic is that it is planted in the fall, and harvested in the summer.The plant fully grown has the appearance of miniature corn to me  To plant take the bulb separate into cloves planting the blunt side down 1 1/2 deep, 6 inches apart.


The garlic is ready to harvest when 2/3 of the leaves turn yellow and dry up.
After harvesting let garlic sit out side until the dirt is dry.

The mud will peel off with one of the layers of paper skin.

Cut roots short from top of garlic.

Place in refrigerator in butter compartment enjoy.